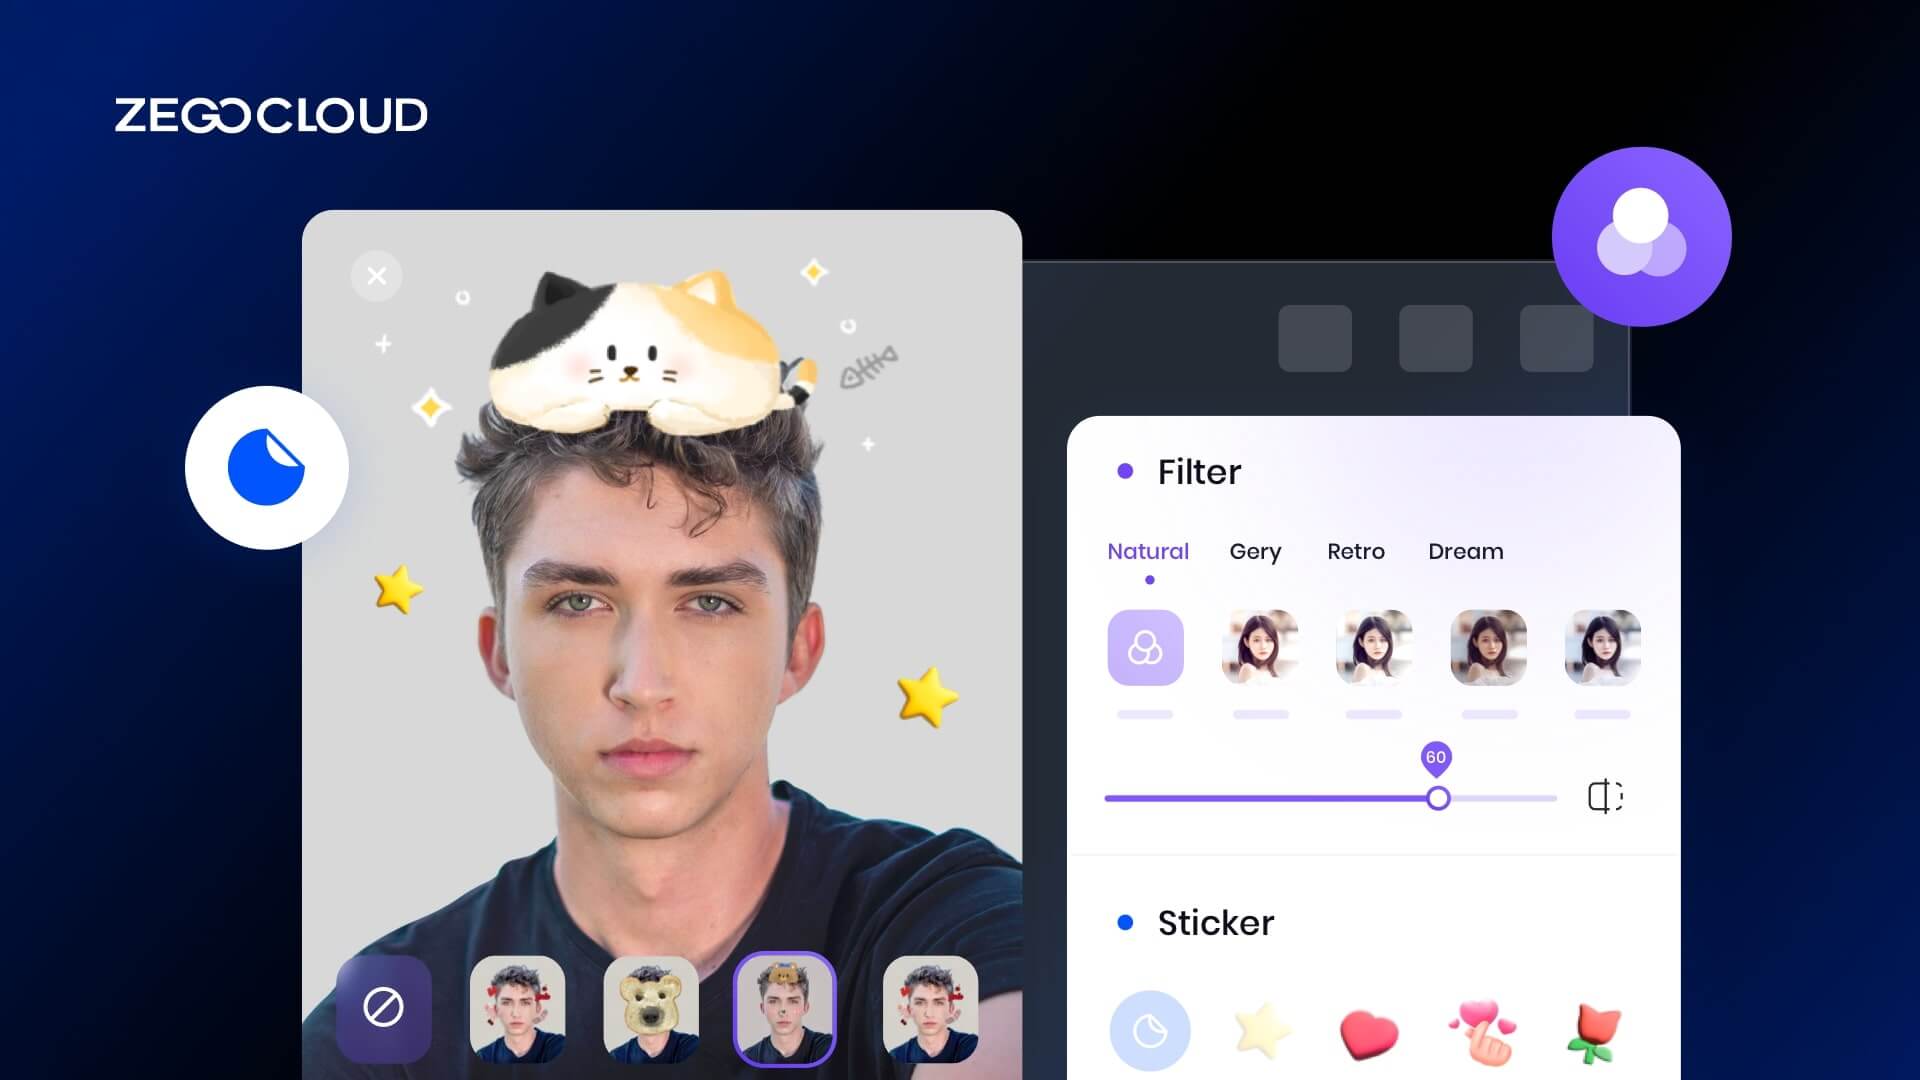
Funny face filters are a fun and creative way to enhance your photos and videos by adding humorous or whimsical effects to your face. Some examples of funny face filters might include a filter that adds a pair of cartoon-like bunny ears to your head, one that turns your face into a comical animal, or one that distorts your facial features in a silly way. In this section, we’ll learn how to make funny face filters online using ZEGOCLOUD AI Effects (ZegoEffects) SDK.
How to Make an App for Funny Face Filters
The ZegoEffects SDK provides a variety of artificial intelligence-powered real-time video effects, such as face beautification, augmented reality effects, image segmentation, and more. These effects have a wide range of applications, including social and entertainment live streaming, online education, and camera tools.
There are several benefits to using ZegoEffects SDK for funny face filters online, a software development kit (SDK) that allows developers to integrate ZEGOCLOUD AI effect features into their own applications. The following are some of the primary benefits of using the ZegoEffects SDK:
1. Face recognition powered by AI
The ZEGOCLOUD AI Effect SDK employs artificial intelligence (AI) to detect and track the user’s face, ensuring that the effects are applied precisely and smoothly. This is especially useful for developers who want to provide a variety of virtual effects and face filters to their users but lack the skills or resources to do so manually.
2. Options for personalization
The ZEGOCLOUD AI Effect SDK includes several customization options that allow developers to tailor the effects to their preferences. Adjusting the intensity of the effect, selecting specific areas of the face to apply the effect to, and other options are available.
3. Simple integration
The ZEGOCLOUD AI Effect SDK is designed to be simple to integrate into a variety of applications, making it an ideal solution for developers looking to add virtual effects and filters to their apps.
4. Compatibility across platforms
The ZEGOCLOUD AI Effect SDK is cross-platform compatible, including Android, iOS, and Windows, making it a versatile solution for developers looking to reach a large audience.
5. Advanced functions
The ZEGOCLOUD AI Effect SDK includes a number of advanced features, such as multiple face support and automatic skin smoothing, that can improve the user experience and the quality of the virtual effects and filters.
Preparation
- ZEGOCLOUD developer account — Sign up
- Create a project, get the AppID, and get the AppSign.
- Android Studio 2.1 or later.
- a video and audio-capable Android device or emulator
- Basic knowledge of Android app development
Step-by-Step to Add Funny Face Filters Free
Now that we’ve gone over the features of the ZegoEffects SDK, it’s time to put them to use in our project. To accomplish this, we must incorporate the SDK into our app. Follow these steps to incorporate the ZegoEffects SDK into your project:
1. Create a new project.
To start a new project in Android Studio, follow these steps:
- Reach out to the ZEGO team to get the latest version of the SDK.
- Launch Android Studio and go to the File menu. Then select “New Project” from the menu.
- In the “New Project” window, give your application a name and choose a location for it.
- It is generally advised to leave the default settings alone. Once you have finished entering the necessary information, click “Next” and then “Finish“.
2. Import the SDK
To include SDK files in your build process, add the following to your project:
- Make a directory in your project dedicated to SDK files.
App/libsis a common location for these files. - Place the SDK files you want to use in the newly created directory.
- In your project, open the
app/build.gradlefile. - Insert the following code into the file:
dependencies {
    implementation fileTree(dir: 'libs', include: ['*.jar'])
}
This will include the SDK files in the build process of your project.
3. Granting permission
To allow your app to access Android system resources, grant the following permissions:
- Navigate to the
AndroidManifest.xmlfile in your project’s app/src/main directory. Insert the following code into the file:
<!-- Permissions required by the SDK -->
<uses-permission android:name="android.permission.ACCESS_WIFI_STATE" />
<uses-permission android:name="android.permission.INTERNET" />
<uses-permission android:name="android.permission.ACCESS_NETWORK_STATE" />- To ensure that the names of the classes used by the SDK are not modified during the build process, you can add the following line to the
proguard-rules.profile:
-keep class .zego.{*;}This will prevent the obfuscation of class names.
4. Import resources and models
To utilize the artificial intelligence-powered capabilities of the ZegoEffects Software Development Kit (SDK), you must first import the necessary resources or models.
- For features like skin tone improvement, teeth whitening, cheek blush, and stickers, you should import the relevant resources.
- For features like eye enlargement, face slimming, and portrait segmentation, you should import the related models.
Note: Be sure to import the necessary resources or models before using the SDK’s corresponding features.
5. Implementation steps
- Specify the exact location of the AI resources or models.
// Specify the resources' absolute path.

ArrayList<String> aiResourcesInfos = new ArrayList<>();
aiResourcesInfos.add("sdcard/xxx/xxxxx/FaceWhiteningResources.bundle");
aiResourcesInfos.add("sdcard/xxx/xxxxx/PendantResources.bundle");
aiResourcesInfos.add("sdcard/xxx/xxxxx/RosyResources.bundle");
aiResourcesInfos.add("sdcard/xxx/xxxxx/TeethWhiteningResources.bundle");
aiResourcesInfos.add("sdcard/xxx/xxxxx/FaceDetectionModel.model");
aiResourcesInfos.add("sdcard/xxx/xxxxx/Segmentation.model");- Before using the
createmethod to create aZegoEffectsobject, make sure you’ve set the necessary resource and model paths with thesetResourcesmethod. This allows the necessary resources and models to be loaded.
ZegoEffects.setResources(aiResourcesInfos);Steps to Implement Basic Image Processing
The following diagram shows the API call sequence for basic image processing using the ZegoEffects SDK:
To use the ZegoEffects object to process images with AI features, you need to do the following:
- Import the necessary AI resources or models by calling the setResources method and providing the absolute paths of the relevant models.
//Specify the absolute path of the face recognition model, which is required for features such as face detection, eye enlargement, and face slimming.

ArrayList<String> aiModeInfos = new ArrayList<>();
aiModeInfos.add("sdcard/xxx/xxxxx/FaceDetectionModel.bundle");
aiModeInfos.add("sdcard/xxx/xxxxx/Segmentation.bundle");

// Set the list of model paths, which must be called before calling the create method.

ZegoEffects.setResources(aiModeInfos);- Create an
ZegoEffectsobject by calling thecreatemethod and passing the license parameter the content of the license file.
// Create a ZegoEffects object, passing the content of the license file to the `license` parameter.
String license = "xxxxxxx";
ZegoEffects mEffects = ZegoEffects.create(license, applicationContext);- Call the
initEnvmethod on theZegoEffectsobject, passing in the width and height of the original image to be processed.
// Initialize the ZegoEffects object, passing in the width and height of the original image to be processed.
mEffects.initEnv(1280, 720);- Enable the desired AI features by using methods like
enableWhiten,enableBigEyes,setPortraitSegmentationBackgroundPath, andenablePortraitSegmentation.
// 1. Enable the skin tone enhancement feature.
// 2. Enable the eyes enlargeing feature.
// 3. Enable the AI portrait segmentation feature, passing in the absolute path of the segmented background image.
mEffects.enableWhiten(true)
      .enableBigEyes(true)
      .setPortraitSegmentationBackgroundPath("MY_BACKGROUND_PATH", ZegoEffectsScaleMode.ASPECT_FILL);
.enablePortraitSegmentation(true);- Invoke the
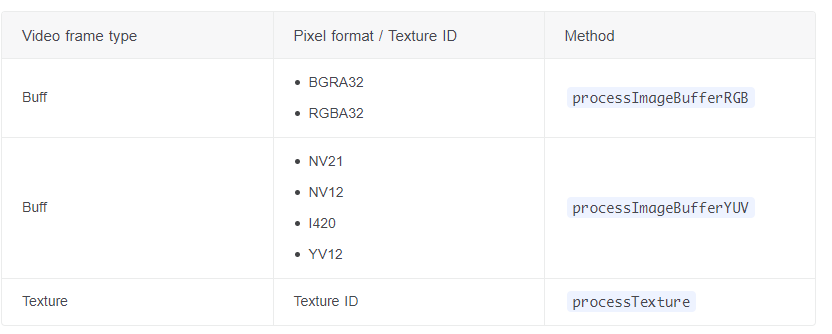
processTexturefunction to apply image processing on the original image by providing the texture data as an argument. You can also utilize other formats, such as YUV, for image processing. Refer to the table below for more information.

ZegoEffectsVideoFrameParam zegoEffectsVideoFrameParam = new ZegoEffectsVideoFrameParam();
zegoEffectsVideoFrameParam.setFormat(ZegoEffectsVideoFrameFormat.RGBA32);
zegoEffectsVideoFrameParam.setWidth(width);
zegoEffectsVideoFrameParam.setHeight(height);
// Pass in the textureID of the original video frame to be processed, and return the textureID of the processed video frame.
zegoTextureId = mEffects.processTexture(mTextureId, zegoEffectsVideoFrameParam);
For more information on face retouching for more funny face filter effects, please visit the AI Effects documentation.
Run a demo
Conclusion
In conclusion, the funny face filter using ZEGOCLOUD AI Effects is a useful and entertaining tool that allows users to transform their facial features in real-time. With the power of artificial intelligence and image processing, this filter can create a wide range of humorous and absurd looks, adding an element of fun to video calls and social media interactions. Overall, the funny face filter is a simple yet effective way to bring a smile to someone’s face and brighten their day.
Read More
FAQ
Q1: What tools or SDKs can I use to build a funny face filter app?
Developers often start with SDKs like ZEGOCLOUD, Banuba, Snap Camera Kit, or FaceUnity because they provide real-time face tracking, AR effects, and beauty filters out of the box. These tools save time compared to building face detection from scratch.
Q2: How do I implement real-time face tracking for funny filters?
You can use libraries such as MediaPipe FaceMesh, OpenCV, or ZEGOCLOUD’s built-in face detection. These tracks’ facial landmarks, like eyes, mouth, and nose, allow you to apply distortions or effects precisely in real time.
Q3: Which programming language or framework is best for building a face filter app?
You can use Kotlin or Java for Android, Swift or Objective-C for iOS, and Flutter or React Native for cross-platform development. SDKs like ZEGOCLOUD or Banuba also provide ready-to-use APIs and UIKits that work seamlessly across platforms, helping you build and deploy faster.
Q4: How do I add funny face filters into a live video or streaming app?
Use an RTC SDK like ZEGOCLOUD, which supports real-time video processing. You can integrate AI filters directly into video calls or live broadcasts with minimal latency.
Let’s Build APP Together
Start building with real-time video, voice & chat SDK for apps today!


