

Quick start
This doc will guide you to integrate the In-app Chat Kit and start a chat quickly.
Prerequisites
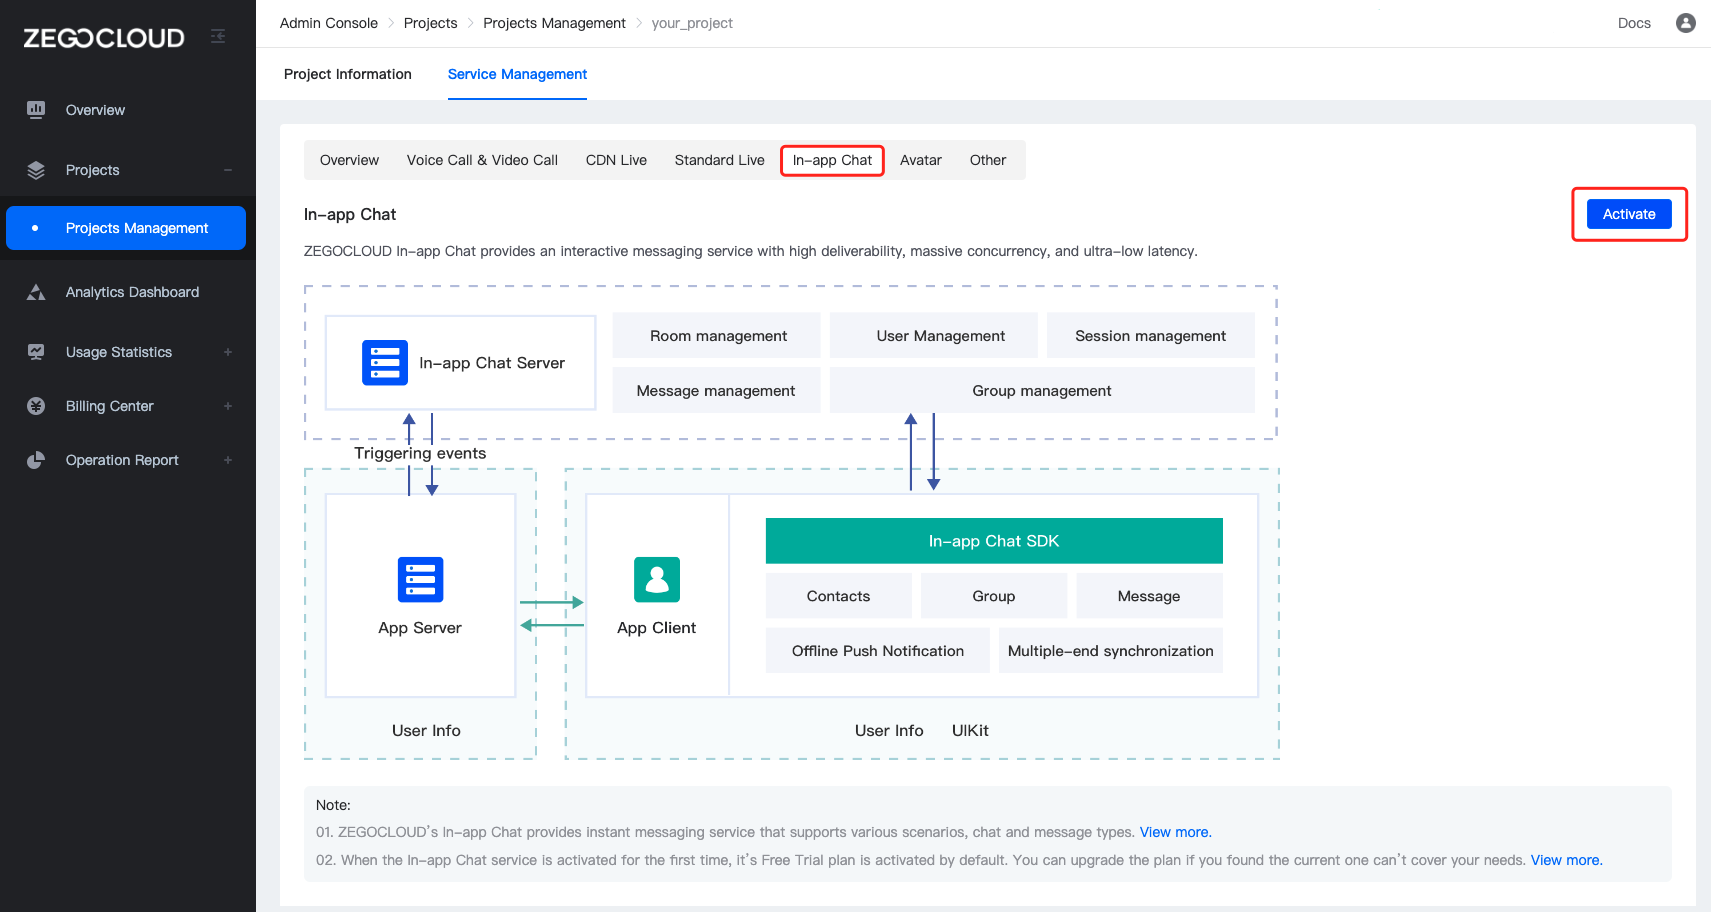
- Go to ZEGOCLOUD Admin Console and do the following:
- Create a project, and get the
AppIDandAppSignof your project. - Activate the In-app Chat service.
- Create a project, and get the
Integrate the SDK
Add SDK dependencies (using yarn or npm)
- Add @zegocloud/zimkit-rn as dependencies.
yarn add @zegocloud/zimkit-rn
npm install @zegocloud/zimkit-rn
- Add other dependencies.
Run the following command to install other dependencies for making sure the @zegocloud/zimkit-rn can work properly:
yarn add zego-zim-react-native@2.12.1 react-delegate-component @react-navigation/native @react-navigation/native-stack react-native-screens react-native-safe-area-context
npm install zego-zim-react-native@2.12.1 react-delegate-component react-delegate-component @react-navigation/native @react-navigation/native-stack react-native-screens react-native-safe-area-context
Integrate In-app Chat Kit into the project
-
Create an instance and log in.
a. Call the
initmethod to initialize the In-app Chat Kit SDK.b. Log in by calling the
connectUsermethod with your user information. And the login only succeeded when the authentication passed.
You can customize rules to generate the user ID and user name. We recommend that you set a meaningful user ID. You can associate the user ID with your business account system.
import { useEffect } from 'react';
import { useNavigation } from '@react-navigation/native';
import { ZIMKit } from '@zegocloud/zimkit-rn';

export default function LoginPage() {
    const navigation = useNavigation(); // Use the React Navigation for page routing.
    const appConfig = {
        appID: 0, // The AppID you get from ZEGOCLOUD Admin Console.
        appSign: '', // The AppSign you get from ZEGOCLOUD Admin Console.
    };

    useEffect(() => {
        ZIMKit.init(appConfig.appID, appConfig.appSign);
        ZIMKit.connectUser({
            userID: '', // Your ID as a user.
            userName: '' // Your name as a user.
        }, '')
        .then(() => {
            // Implement your event handling logic after logging in successfully.
            // Navigate to the In-app Chat Kit page.
            navigation.navigate('HomePage');
        });
    }, []);
}
- Use React Navigation to import and page routing the
MessageListPagepage.
import { createNativeStackNavigator } from '@react-navigation/native-stack';
import { MessageListPage } from '@zegocloud/zimkit-rn';
import LoginPage from './LoginPage.js'; // Import the login page you created.
import HomePage from './HomePage.js'; // Import the In-app Chat home page you created.

const Stack = createNativeStackNavigator();

export default function AppNavigation() {
  return (
    <Stack.Navigator initialRouteName="LoginPage">
        <Stack.Screen
            name="LoginPage"  // Specify a page route for the login page.
            component={LoginPage}  // Fill in the imported login page.
        />
        <Stack.Screen
            name="HomePage"  // Specify a page route for the In-app Chat home page.
            component={HomePage}  // Fill in the imported In-app Chat home page.
        />
        <Stack.Screen
            name="MessageListPage"  // Specify a page route for the message list page.
            component={MessageListPage}  // Fill in the imported message list component.
        />

        {/* Other page info. */}

    </Stack.Navigator>
  );
}
- Display the In-app Chat Kit components.
import { useEffect } from 'react';
import { useNavigation } from '@react-navigation/native';
import { SafeAreaView, Button } from 'react-native';
import { ConversationList } from '@zegocloud/zimkit-rn';

export default function HomePage() {
    const navigation = useNavigation(); // Use the React Navigation for page routing.
    const goToMessageListPage = props => {
        // Rount to the message list page via the React Navigation.  For more, refer to: https://reactnavigation.org/
        navigation.navigate('MessageListPage', {
            ...props,
            // The callback method for the top button on the message list page.
            appBarActions: [
                {
                    icon: 'goBack',
                    onPressed: () => {
                        navigation.goBack();
                    },
                },
            ],
        });
    };
    const onPressed = (props) => {
        goToMessageListPage(props);
    };
    const createGroupChat = () => {
        const groupName = 'test group'; // The name of the group you created.
        const userIDs = []; // The ID list of the users that you want to invite to the group chat
        const optional = { groupID: 'group1' };
        ZIMKit.createGroup(groupName, userIDs, optional).then(data => {
            if (!data.code) {
                const {groupInfo, errorUserList} = data;
                const {baseInfo} = groupInfo;
                const props = {
                    conversationID: baseInfo.groupID,
                    conversationName: baseInfo.groupName,
                    conversationType: 2,
                };
                goToMessageListPage(props);
            } else {
                // Implement your event handling logic when failing to create a group chat.
            }
        });
    };
    const joinGroupChat = () => {
        const groupID = 'group1'; // You can get the groupID via the [createGroup] method (the method used to start a group chat).
        ZIMKit.joinGroup(groupID).then(data => {
            if (!data.code) {
                const props = {
                    conversationID: data.groupInfo.baseInfo.groupID,
                    conversationName: data.groupInfo.baseInfo.groupName,
                    conversationType: 2,
                };
                goToMessageListPage(props);
            } else {
                // Implement your event handling logic when failing to join a group chat.
            }
        });
    };

    return (
        <SafeAreaView style={{flex: 1}}>
            <ConversationList onPressed={onPressed}></ConversationList>
            <Button title="create Group Chat" onPress={createGroupChat}></Button>
            <Button title="join Group Chat" onPress={joinGroupChat}></Button>
        </SafeAreaView>
    );
}
Configure your project
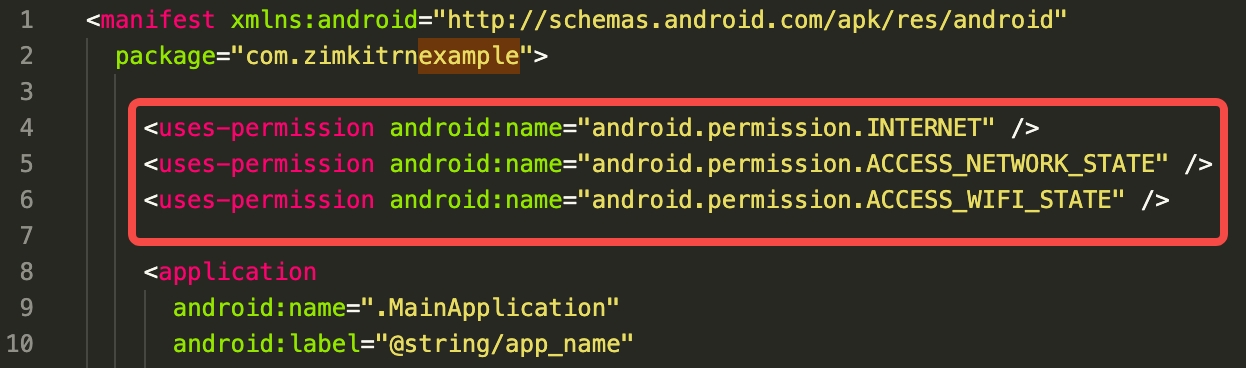
- Android:
Open the my_project/android/app/src/main/AndroidManifest.xml file and add the following:
<uses-permission android:name="android.permission.INTERNET" />
<uses-permission android:name="android.permission.ACCESS_WIFI_STATE" />
<uses-permission android:name="android.permission.ACCESS_NETWORK_STATE" />
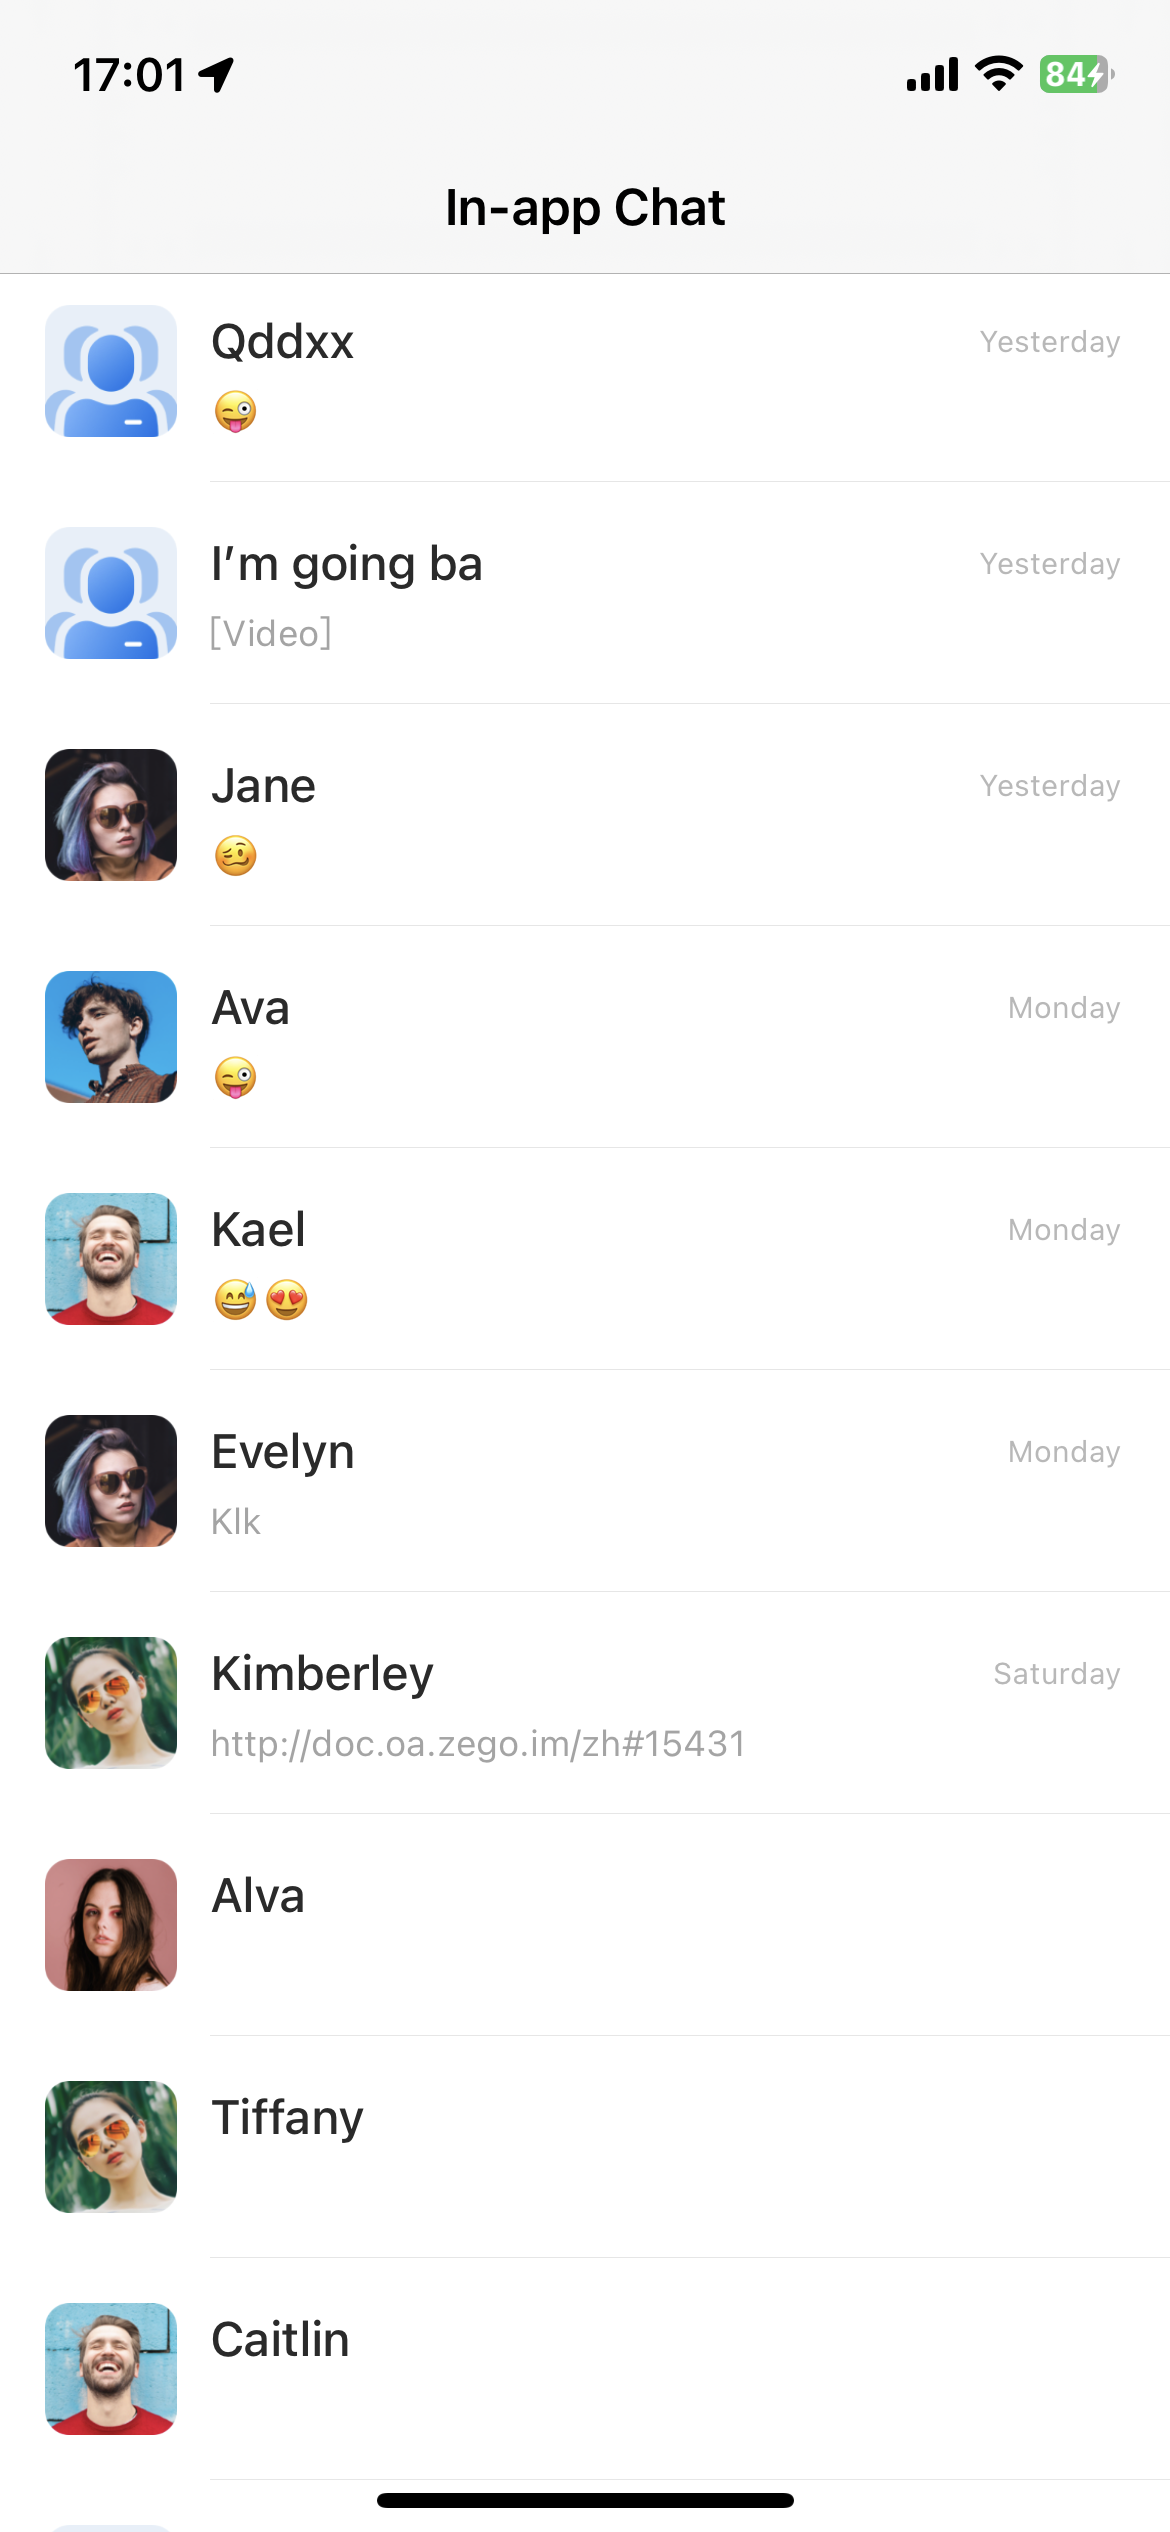
Ideally, by this point, your app will look like this:
Start a chat
In-app Chat Kit supports the following and this section shows you how to implement those respectively:
More to explore
Click here to explore more UI components.
A quick guide to help you run the sample code.
Get support
Need help or want to raise your questions? Click the button below to join our Discord community to get quick responses.