

message notifications
Android Offline Message Push Notifications
To support offline message notifications, you need to configure Android Firebase and Apple Push certificates first.
1. Firebase Console and ZEGO Console Configuration
- step1. In the Firebase console: Create a project. (Resource may help: Firebase Console)
- step2. In the ZEGOCLOUD Admin Console: Upload your FCM certificate
- If you are ready with the Apple APNS certificate at this point, you can upload it together.
- iOS need Apple Push Services certificates, not VoIP certificates. This is different from the CallKit project.
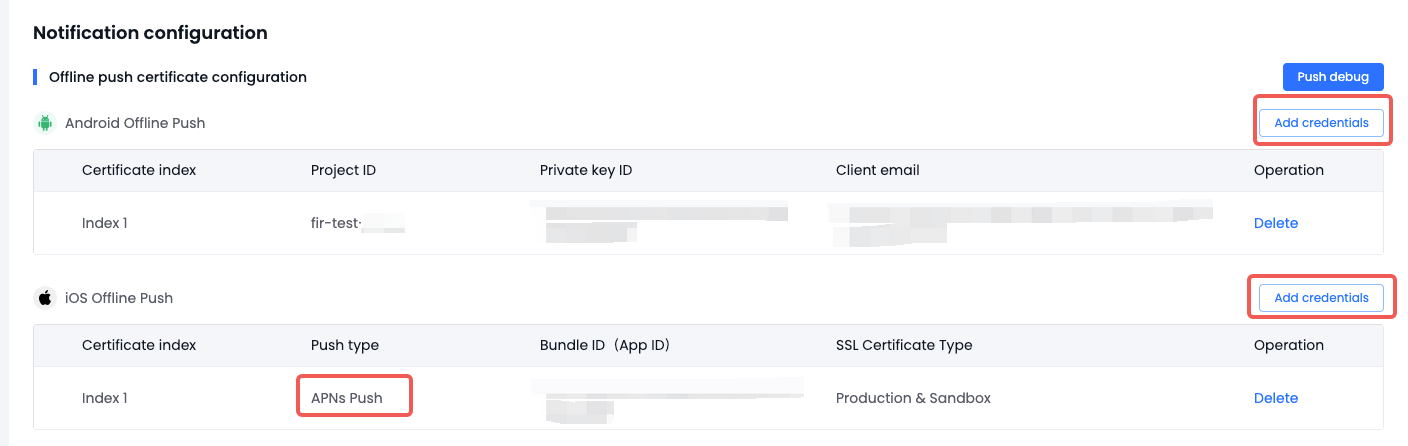
- step3. In the ZEGOCLOUD Admin Console: create a
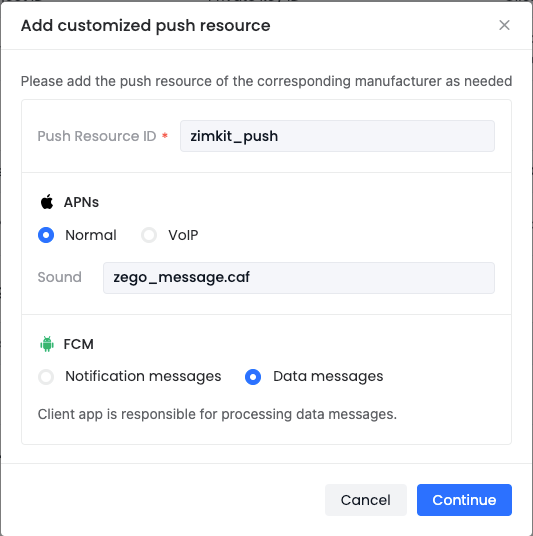
resourceIDfor zimkit.
- You must use these options for zimkit, APNs: Normal, FCM: Data Messages. (Note that it's different from CallKit)
- In the picture,
zego_message.cafis the notification sound ringtone attached to iOS offline message push, apple only supports audio files in caf format, you need to use your own caf file name here. (If you don't need to customize the ringtone, you can leave the sound field empty.) - If you haven't configured the Android or iOS certificate at this point, the ResourceID will not include the options for that platform. as mentioned earlier, We recommend that you also upload the Android and iOS certificate at this time together, then configure the resourceID for both iOS and Android together.
If you haven't configured android and ios together, when you need to configure another platform in the future, you will need to delete and recreate the resourceID to complete the configuration for android and ios.
- step4. In the Firebase console: Create an Android application and modify your project;
2. Modify the initialization code
You need to add the notificationConfig as follows:
- The
resourceIDhere should use theresourceIDcreated in the previous step in the ZEGOCLOUD Admin Console. - If you have other functions in your application that also use channelID, please use a different channelID here.
void main() async {
  ...

  /// init ZIMKit
  await ZIMKit().init(
    appID: yourAppID /*input your AppID*/,
    appSign: yourAppSign /*input your AppSign*/,
    notificationConfig: ZegoZIMKitNotificationConfig(
      resourceID: yourResourceID,
      androidNotificationConfig: ZegoZIMKitAndroidNotificationConfig(
        channelID: yourChannelID,  //  'ZIM Message'
        channelName: yourChannelName,  //  'Message'
        sound: yourSoundFileName,  //  'message'
        icon: yourIconFileName,  //  'notification_icon'
      ),
    ),
  );

  ...
}
3. specify a custom notification sound and icon
- If you need to specify a custom notification icon, you can specify the icon file name id of notification by
androidNotificationConfig.icon, Additionally, you must place your icon file in the following path: ${project_root}/android/app/src/main/res/drawable/${icon}.png - If you need to specify a custom notification sound, you can specify the sound file name id of notification by
androidNotificationConfig.sound, Additionally, you must place your audio file in the following path: ${project_root}/android/app/src/main/res/raw/${sound}.mp3
And the resources should be placed in the following locations:
If your project integrates Call Kit in addition to ZIMKit
4. Add firebase-messaging dependency
Add this line to your project's your_project/android/app/build.gradle file as instructed.
implementation 'com.google.firebase:firebase-messaging:21.1.0'
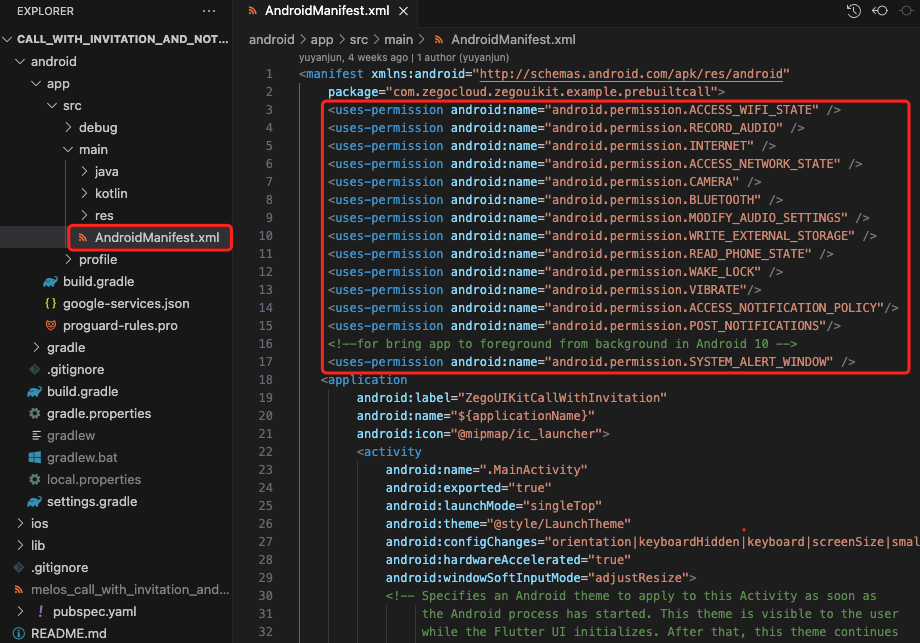
5. Configure notification permissions for your app.
Open the file your_project/app/src/main/AndroidManifest.xml, and add the following code:
<uses-permission android:name="android.permission.ACCESS_WIFI_STATE" />
<uses-permission android:name="android.permission.RECORD_AUDIO" />
<uses-permission android:name="android.permission.INTERNET" />
<uses-permission android:name="android.permission.ACCESS_NETWORK_STATE" />
<uses-permission android:name="android.permission.CAMERA" />
<uses-permission android:name="android.permission.BLUETOOTH" />
<uses-permission android:name="android.permission.MODIFY_AUDIO_SETTINGS" />
<uses-permission android:name="android.permission.WAKE_LOCK" />
<uses-permission android:name="android.permission.FOREGROUND_SERVICE" />
<uses-permission android:name="android.permission.WRITE_EXTERNAL_STORAGE"/>
<uses-permission android:name="android.permission.READ_EXTERNAL_STORAGE"/>
<uses-permission android:name="android.permission.USE_FULL_SCREEN_INTENT" />
<uses-permission android:name="android.permission.REQUEST_IGNORE_BATTERY_OPTIMIZATIONS" />
<uses-permission android:name="android.permission.VIBRATE"/>
<uses-permission android:name="android.permission.READ_MEDIA_VIDEOS"/>
<uses-permission android:name="android.permission.READ_MEDIA_AUDIO"/>
<uses-permission android:name="android.permission.READ_MEDIA_IMAGES"/>

<uses-permission android:name="android.permission.ACCESS_NOTIFICATION_POLICY"/>
<uses-permission android:name="android.permission.POST_NOTIFICATIONS"/>
<!--for bring app to foreground from background in Android 10 -->
<uses-permission android:name="android.permission.SYSTEM_ALERT_WINDOW" />
6. Guide your users to set app permissions (Android only)
Some devices require special permissions to be enabled in order for your app to automatically display in the foreground when receiving a offline message (such as Xiaomi). Therefore, you need to guide your app users to enable the necessary app permissions to make the offline message effective.
- battery settings: Unrestricted.
- notification settings: Switch all to enable.
| notification settings | battery settings |
|---|---|
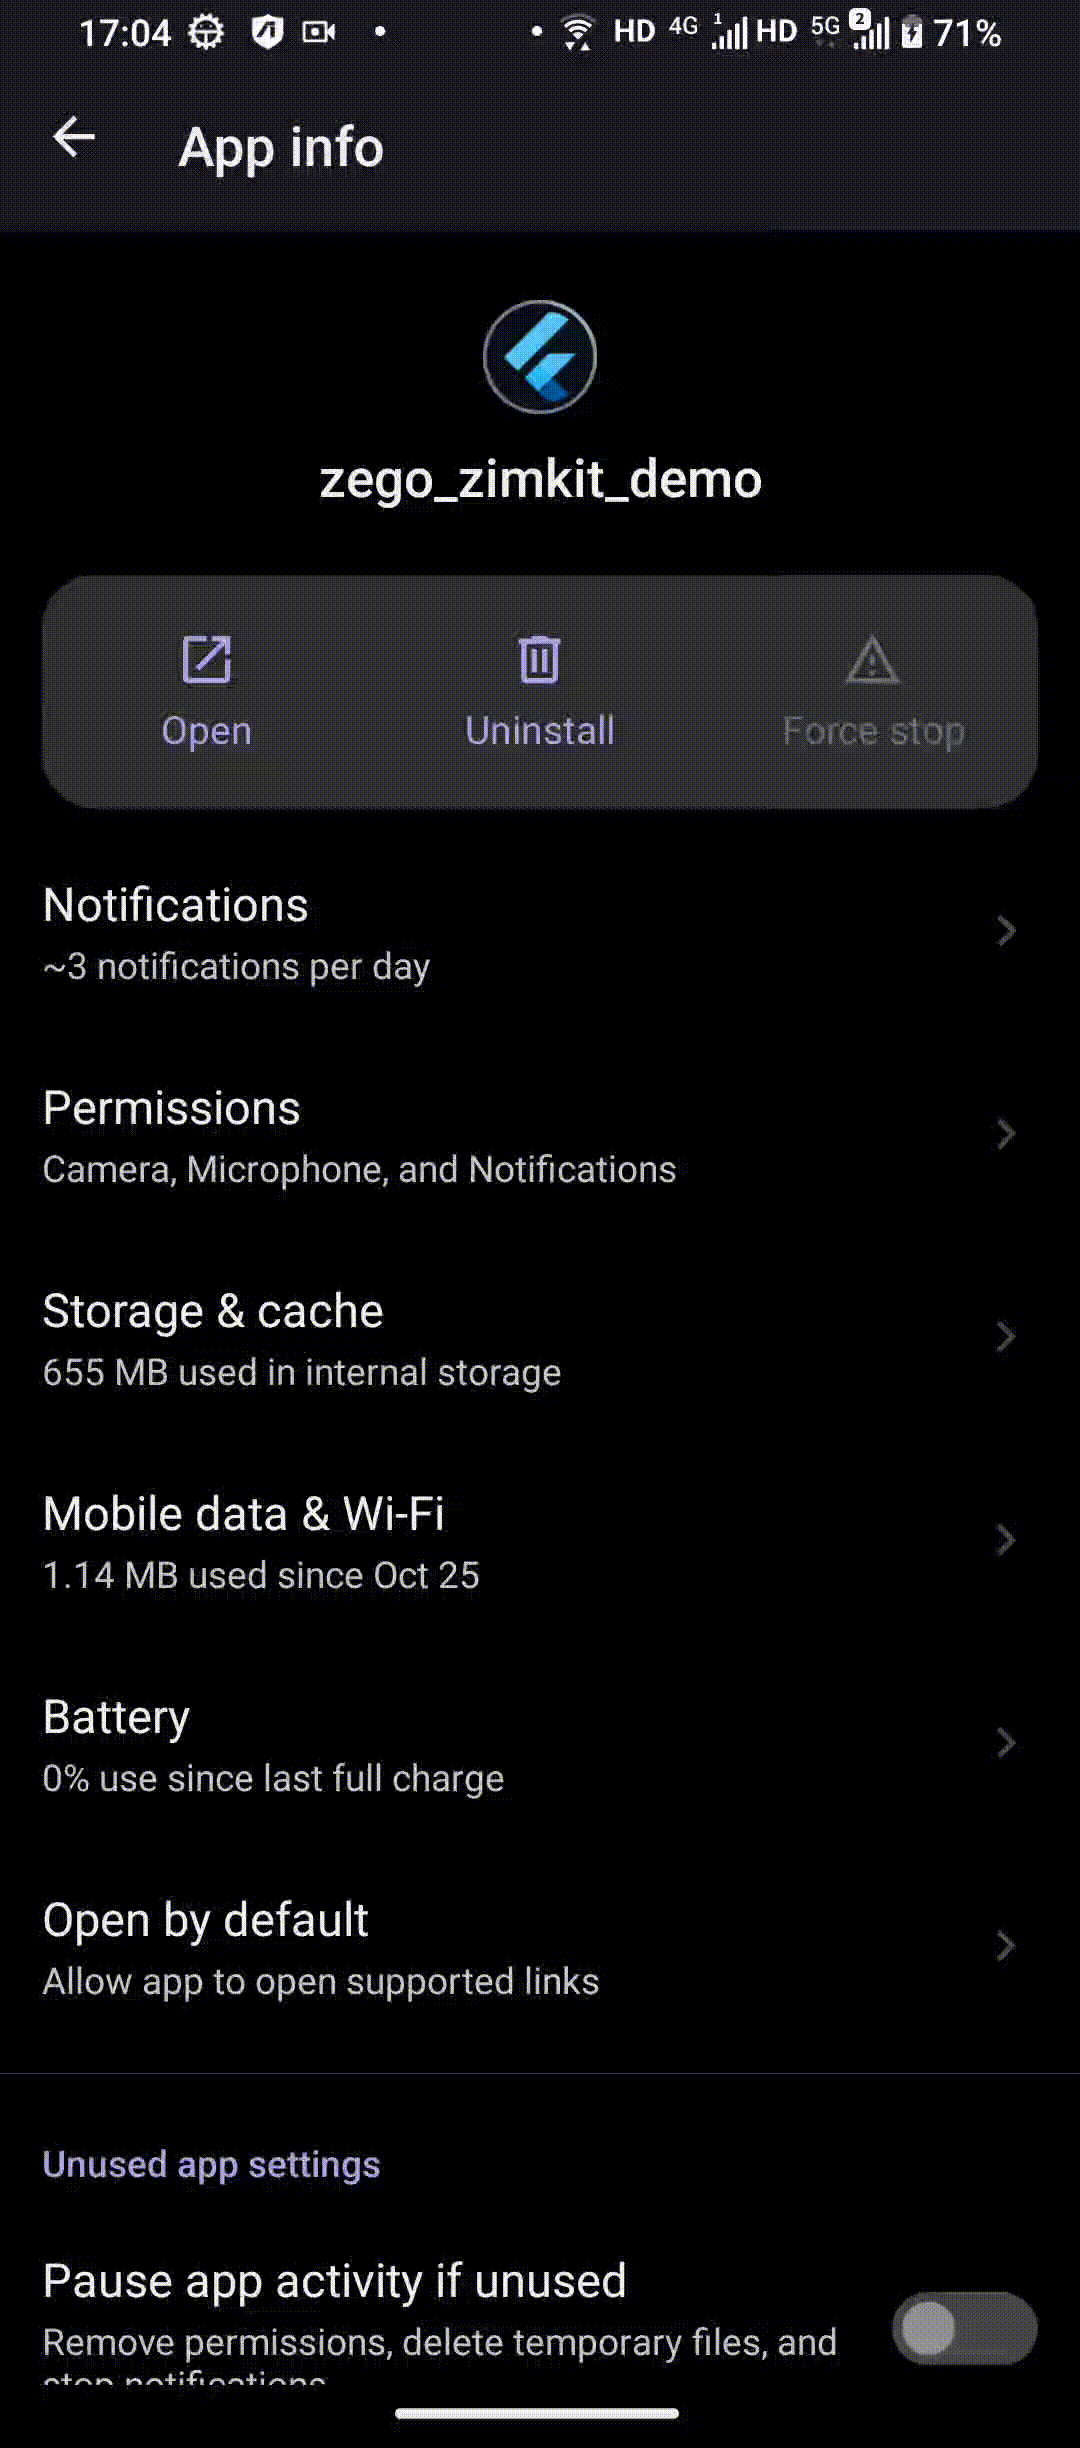 | 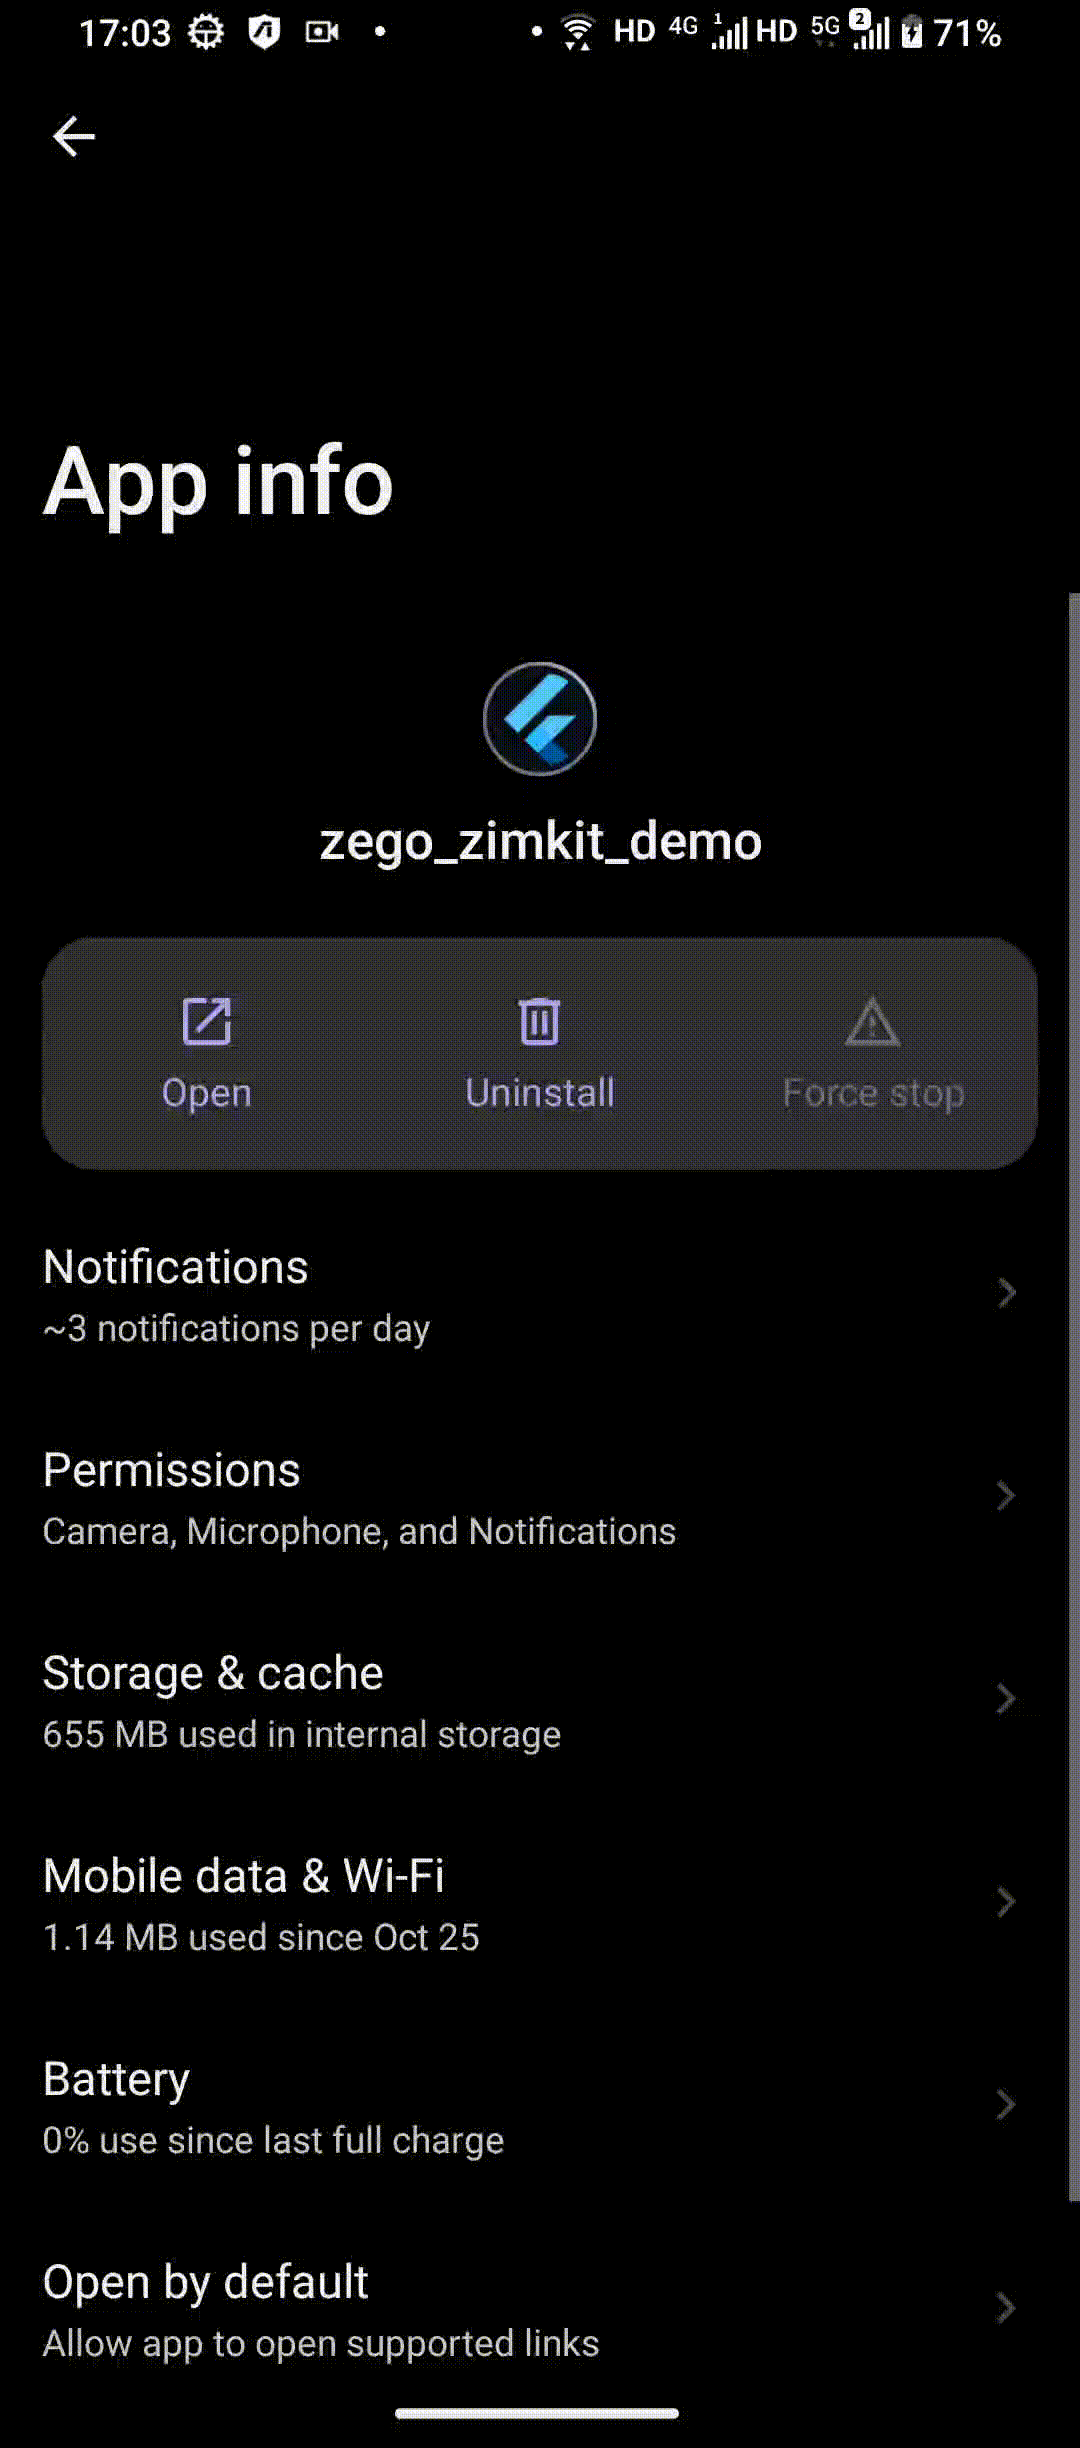 |
Here are the permissions that an app needs on Xiaomi devices for reference:
- Show on locked screen: Switch to Enable
- Display pop-up windows while running in the background: Switch to Enable
- Display pop-up window: Switch to Enable
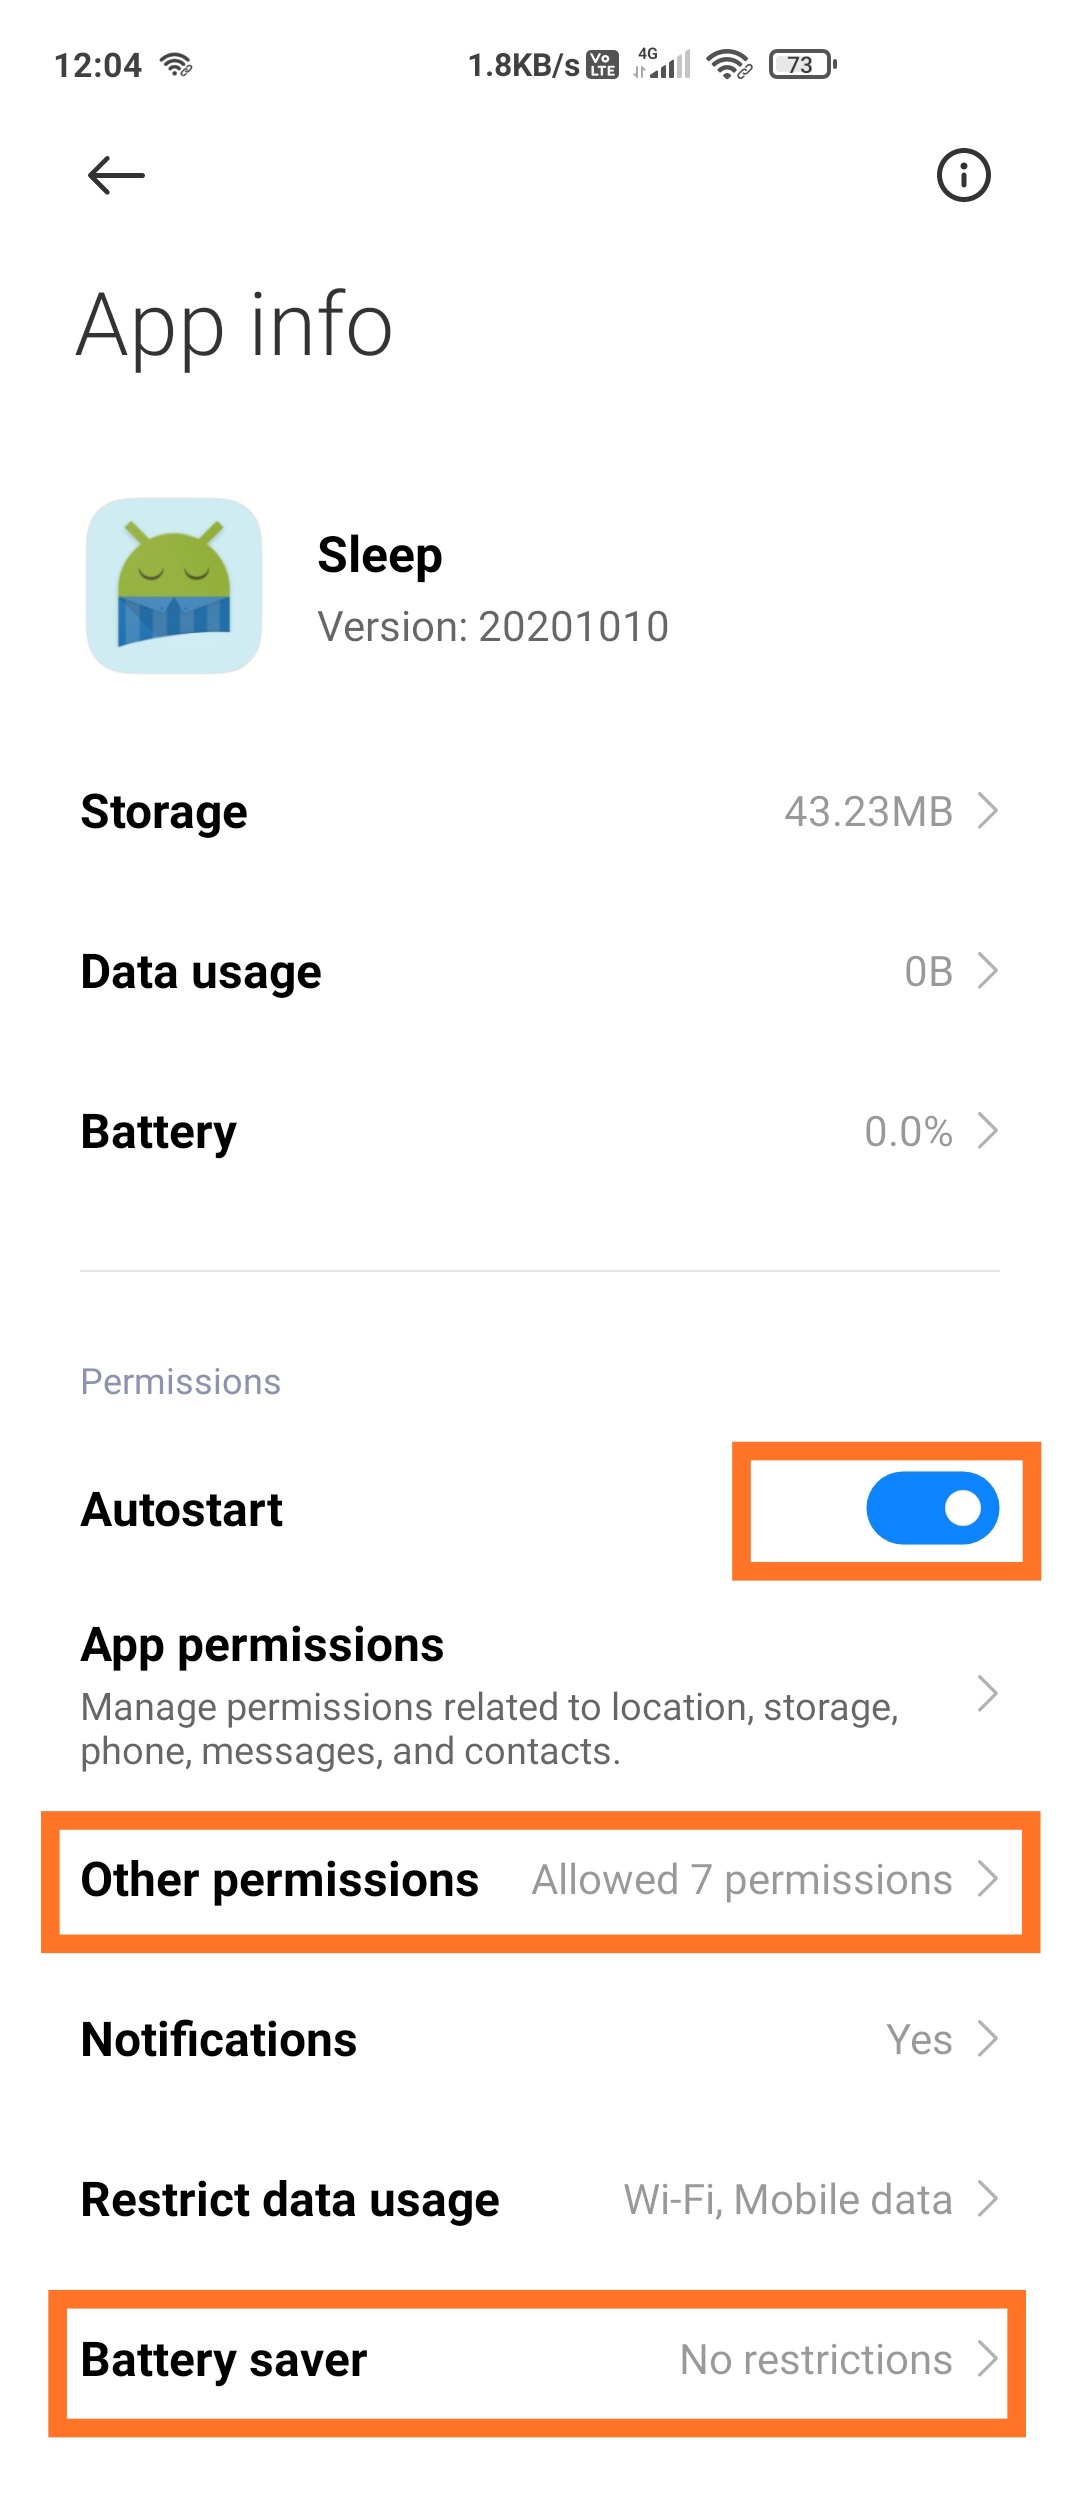 | 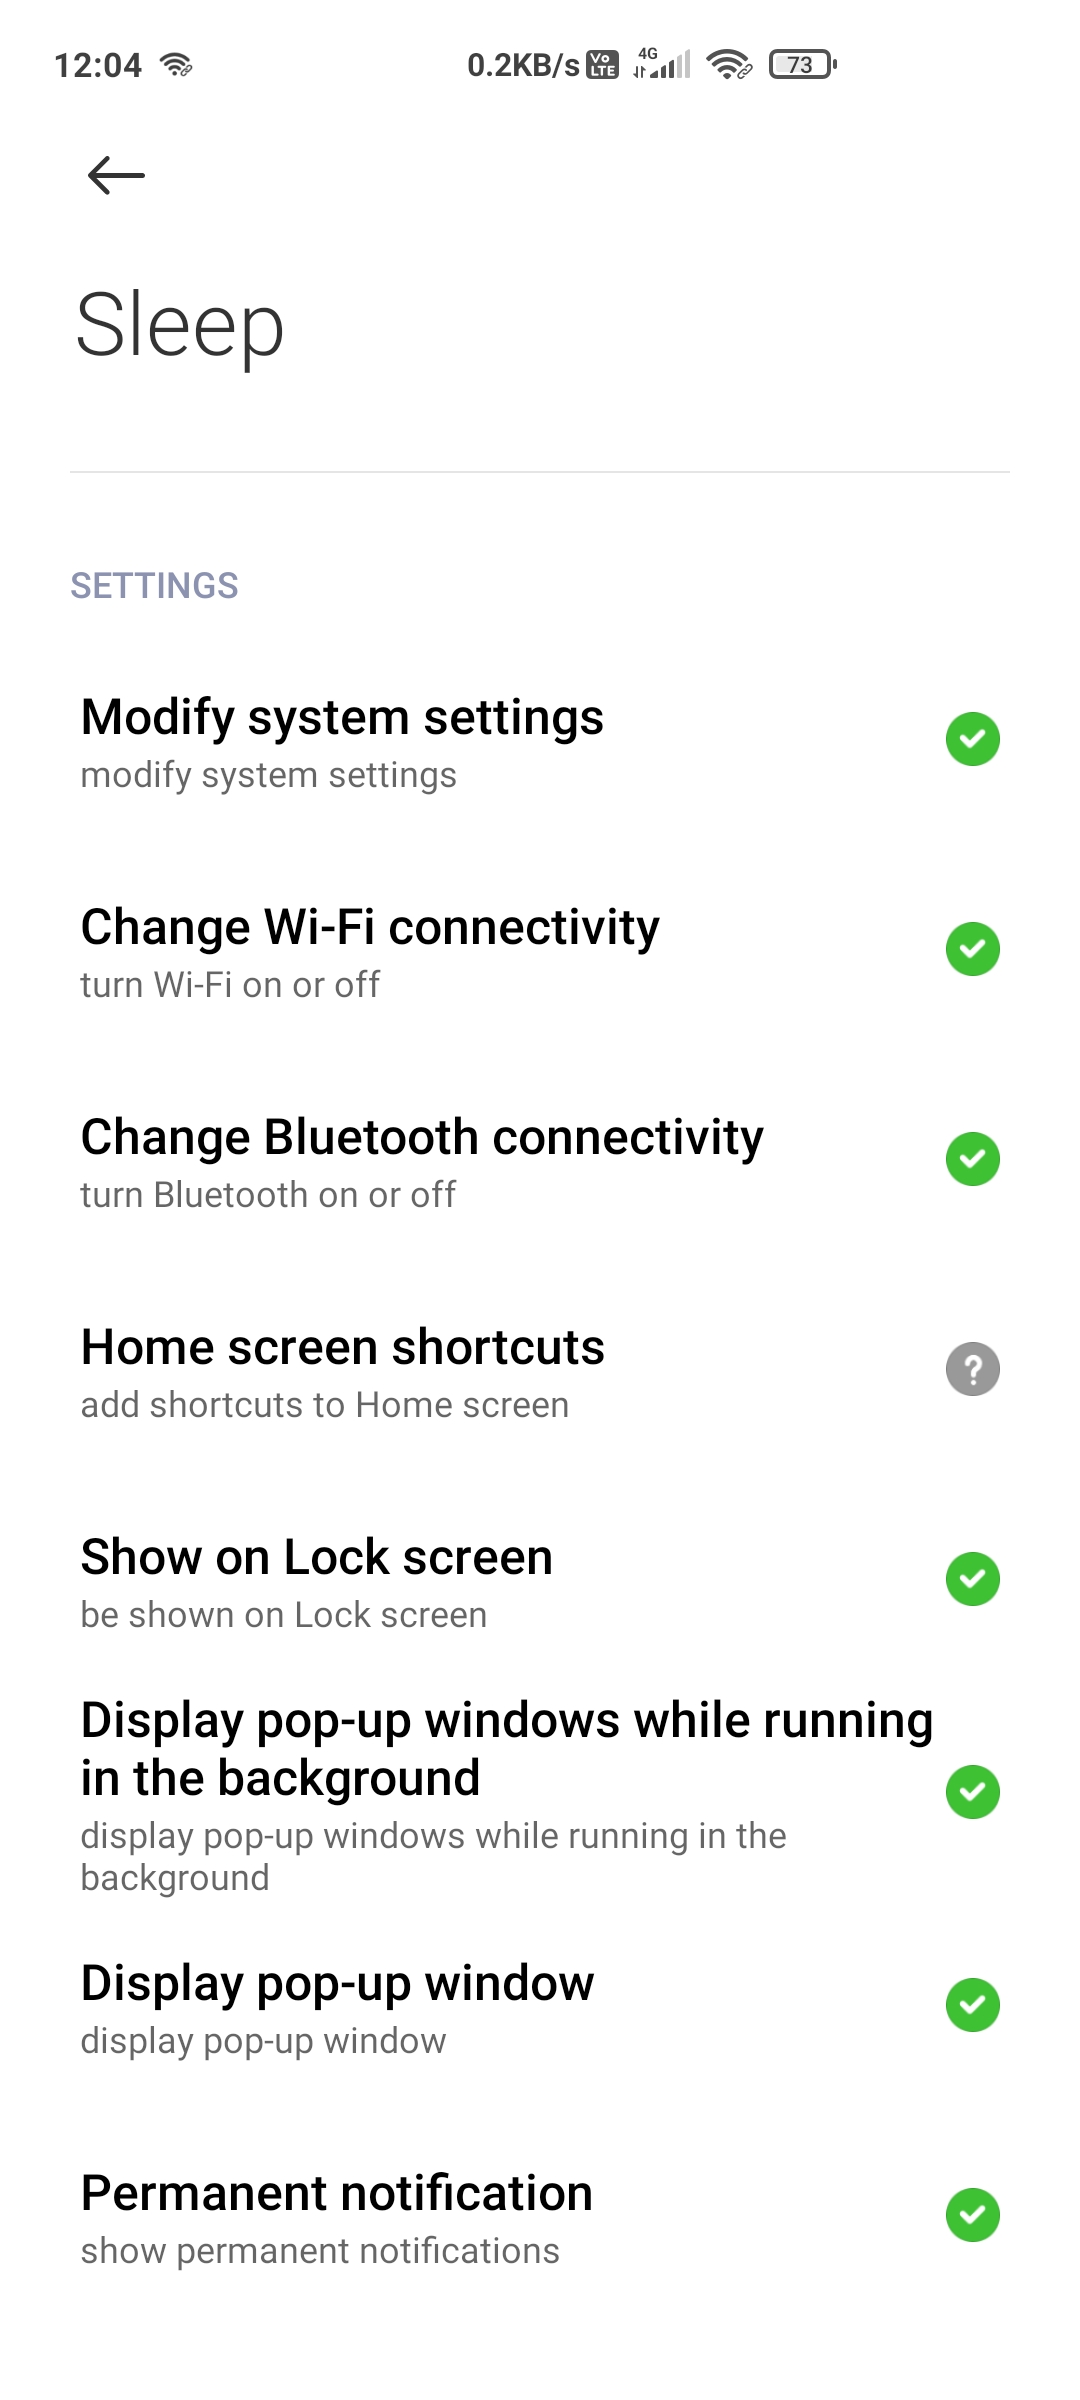 |  |
iOS Offline Message Push Notifications
1. Apple Developer Center and ZEGOCLOUD Console Configuration
-
step1. You need to Create a Apple Push Services Certificate, and export a .p12 file on your Mac.
-
step2. In the ZEGOCLOUD Admin Console: Upload your APNs certificate
Note- iOS need Apple Push Services certificates, not VoIP certificates. This is different from the CallKit project.
-
step3. In the ZEGOCLOUD Admin Console: create a
resourceIDfor zimkit.Warning- You must use these options for zimkit, APNs: Normal, FCM: Data Messages. (Note that it's different from CallKit)
- In the picture,
zego_message.cafis the notification sound ringtone attached to iOS offline message push, apple only supports audio files in caf format, you need to use your own caf file name here. (If you don't need to customize the ringtone, you can leave the sound field empty.) - If you haven't configured the Android or iOS certificate at this point, the ResourceID will not include the options for that platform. as mentioned earlier, We recommend that you also upload the Android and iOS certificate at this time together, then configure the resourceID for both iOS and Android together.
If you haven't configured android and ios together, when you need to configure another platform in the future, you will need to delete and recreate the resourceID to complete the configuration for android and ios.
2. Modify the initialization code
3. Add Push Notifications configuration
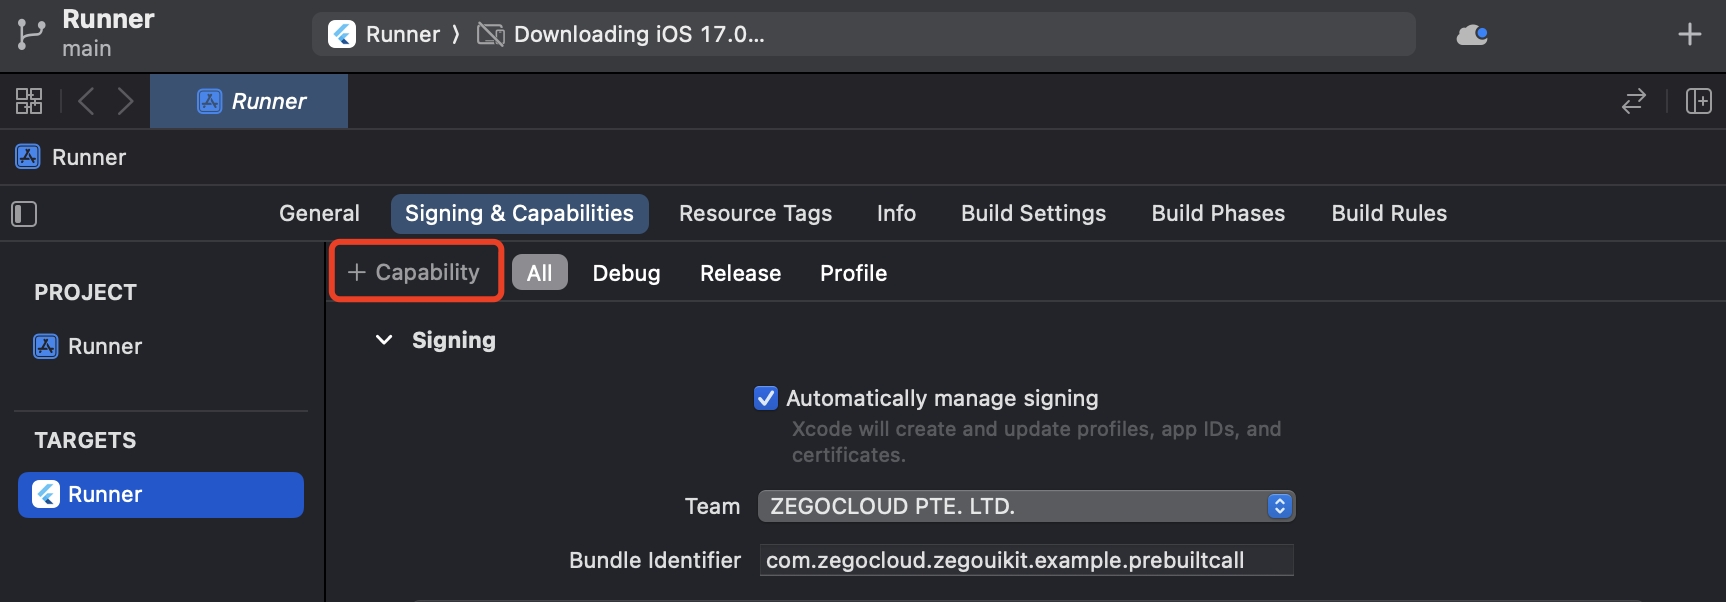
Open the project with Xcode, and click the+ Capability on the Signing & Capabilities page.
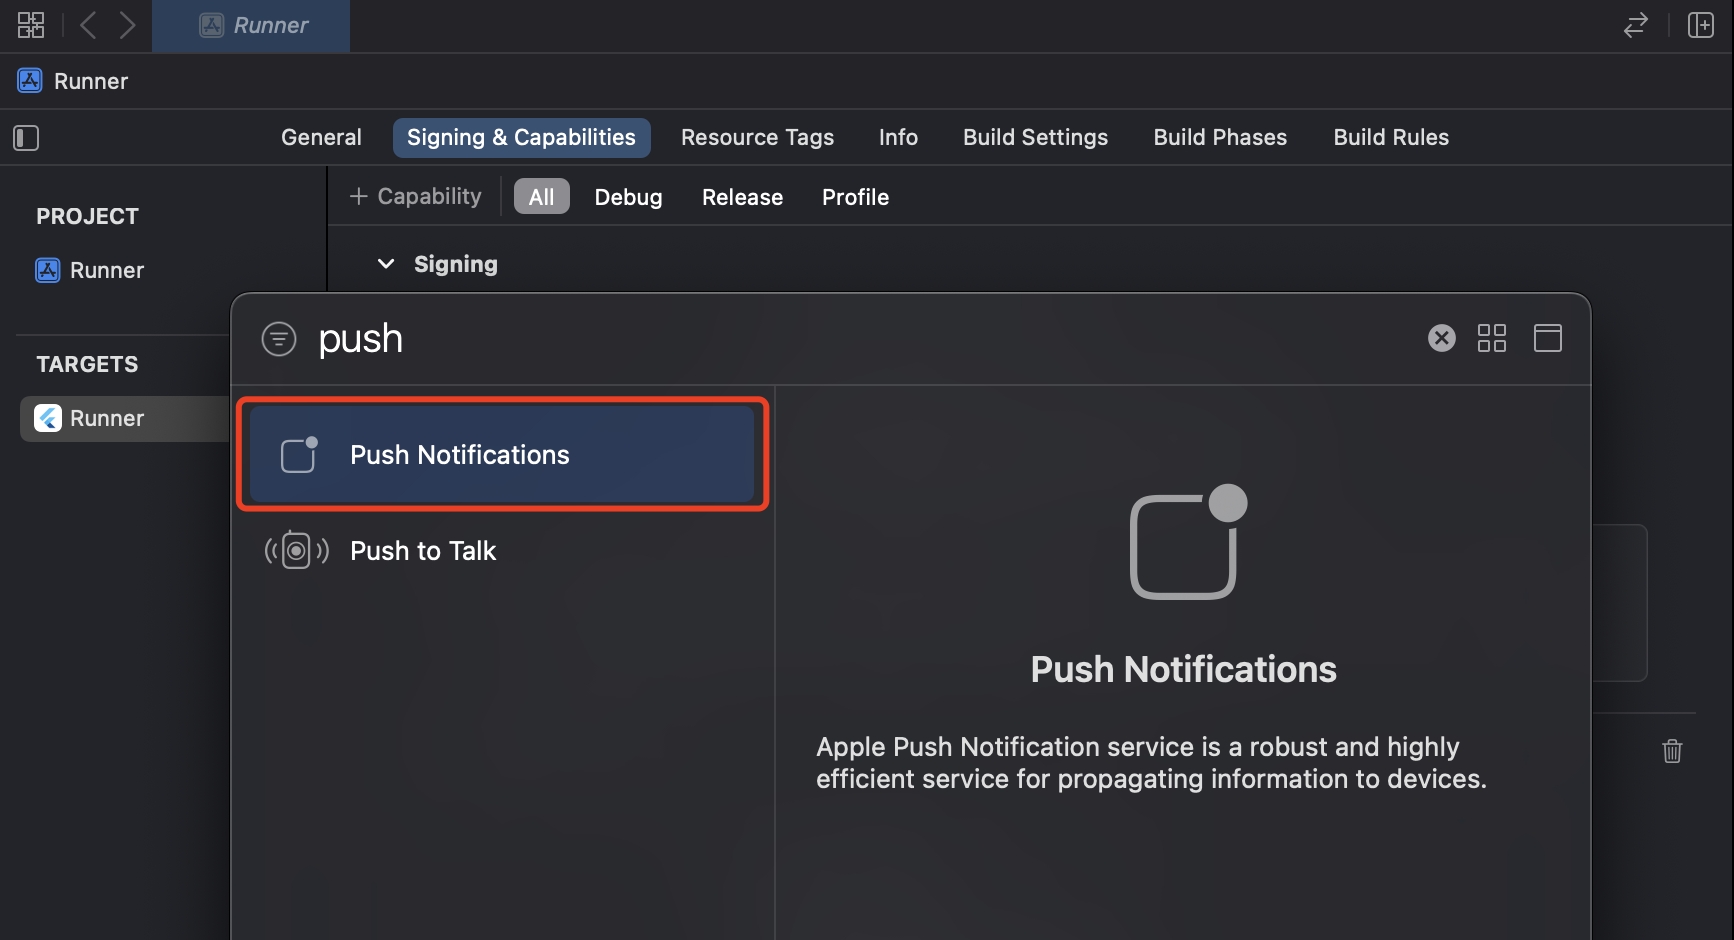
And double-click on Push Notifications to add this feature.
4. Add the Background Modes capability.
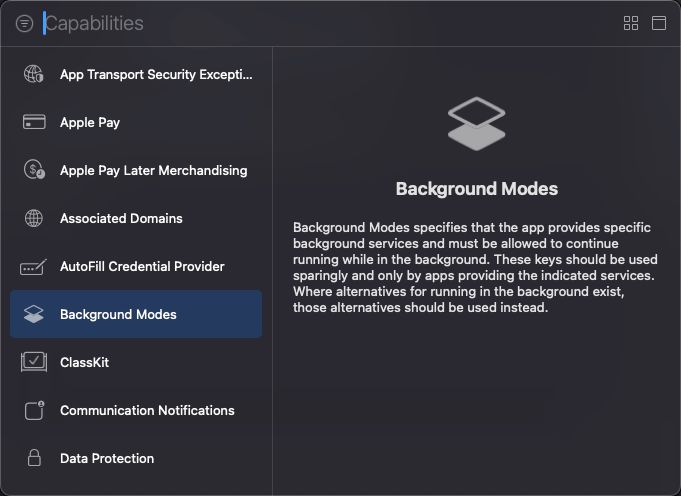
Open the project with Xcode, and click the+ Capability on the Signing & Capabilities page again.
And double-click on Background Modes in the pop-up window. This will allow you to see the Background Modes configuration in the Signing & Capabilities.
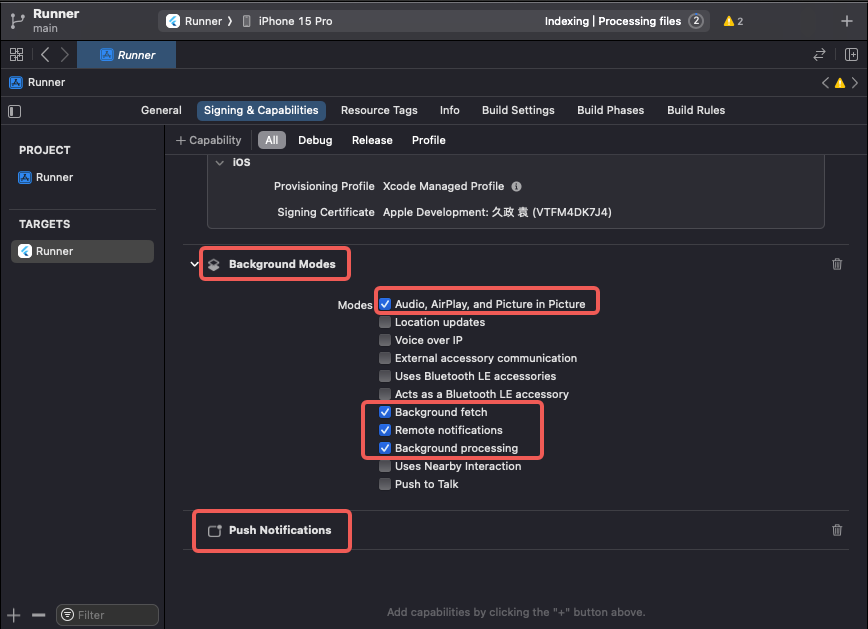
5. Check and Make sure the following features are enabled
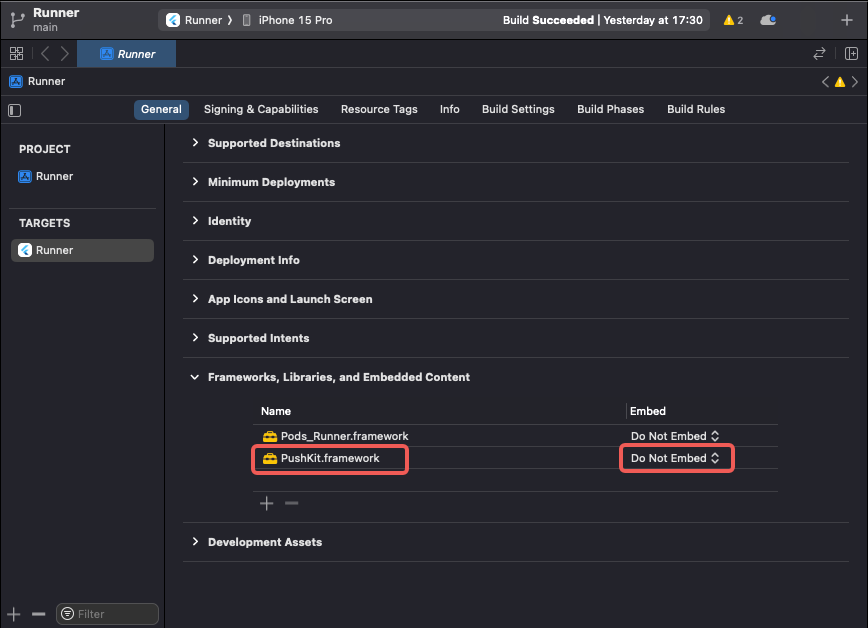
6. Import the PushKit libraries.
7. Configure offline messages notification sound
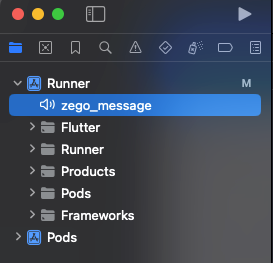
In the previous steps, when configuring the resourceID, we also set up the notification sound for iOS. I believe you have completed this step. The sound file we use in our documentation is zego_message.caf.
Now, we need to import the notification sound file into the Xcode project.
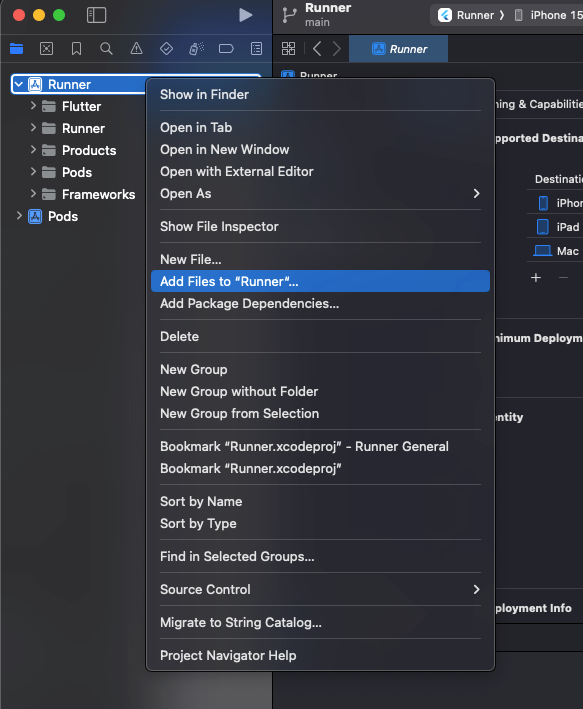
And the resources should be placed in the following locations:
Online Message Notifications
Online notification is much simpler. In general,
- Integrate
flutter_local_notificationsto display any desired notifications.
flutter pub add flutter_local_notifications
- Listen for new messages using
ZIMKit().getOnMessageReceivedNotifier(), and display a notification when a new message is received.
ZIMKit().getOnMessageReceivedNotifier().addListener(_onMessageArrived);
- Control app page navigation by handling the click callback of the notification.
static void onNotificationTappedBackground(NotificationResponse response) {
  //...
  try {
    final Map payload = jsonDecode(response.payload!);
    navigatorKey.currentState?.push(
      MaterialPageRoute(
        builder: (context) {
          return demoMessageListPageID(
            navigatorKey.currentContext!,
            id: payload['id'],
            type: ZIMConversationType.values[payload['typeIndex']],
          );
        },
      ),
    );
  } catch (e) {
    // ...
  }
}
All of these functionalities are already provided in the demo. You can refer to the specific implementation in the demo.